Cells can be audio generators (oscillator or sample) or processors (filter, mixer/amplifier, reverb, delay, envelope etc.).
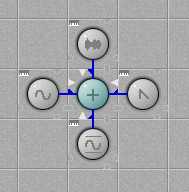
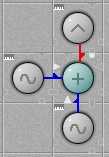
![]() Every Cell has up to 4 audio inputs and 4 modulation inputs from its neighbouring cells; up, down, left and right.
Every Cell has up to 4 audio inputs and 4 modulation inputs from its neighbouring cells; up, down, left and right.
The audio output of each Cell goes not only to its neighbours but also (optionally) to the stereo output of CellSynth.
You create an active cell by dragging one from the cell stores at the top and bottom of the round
window.![]()
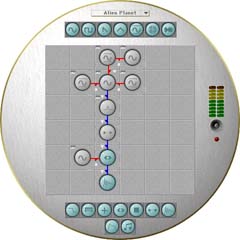
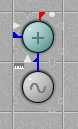
 Here we have 4 cells:
Therefore this matrix shows that the audio signals from the sine oscillators are going into the mixer, and the mixer is being modulated by the triangle oscillator.
The oscillators are greyed, that means that the audio signal for the cell is muted (not heard at the stereo output). The output of the mixer cell is the only audio that can be heard in this matrix.
When you move the cursor over the tile surrounding an active Cell, the cursor will change to a hand. This indicates that if you click the mouse button and hold it, you can drag the Cell to another location.
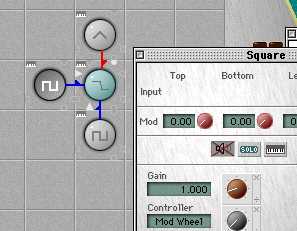
A Cell Edit window contains all the parameters for the Cell you are editing.
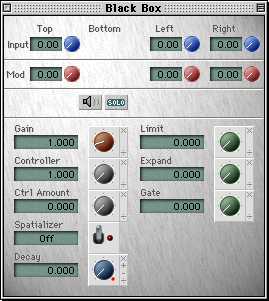
The first row of controls affect the amount of audio input from the Cells neighbours (Top, Bottom, Left and Right).
The second row affects the modulation from the neighbouring cells.
When you turn up, for example, the audio input to a cell from its neighbour to the left, the Matrix displays a blue arrow to indicate that the cell is receiving audio input.
The same is true of the modulation inputs, except the line is red.
You can also set the audio input to 1.0 by clicking on the white triangle on the Celląs tile on the Matrix and modulation to 1.0 by clicking on the white semi-circle.
The Mute, MIDI Control, Solo buttons, some or all of which will be present depending on the Cell being edited, are simple on/off buttons.
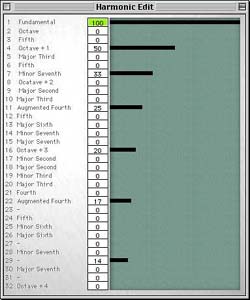
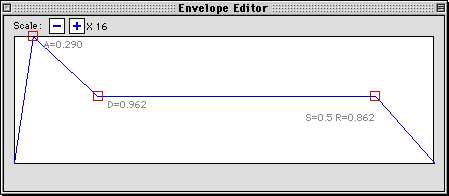
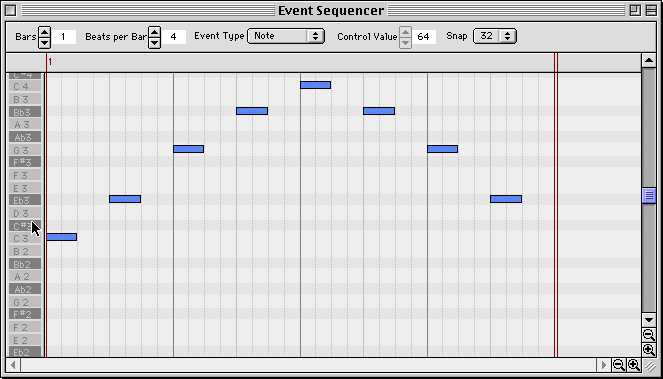
There may also be a fourth editor button. This opens a further editor window for the cell being edited. These are discussed in detail later, but here is a brief tour of these additional editor windows:
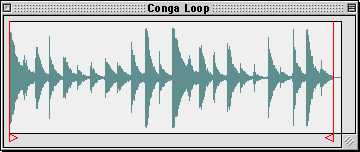
The Sample Cell has a window that allows the start and end point of a sample to be set.
 |
 |
 |
 |
There is more functionality built into these controls than first meets the eye. Here is a quick guide to some of them:
Control and Option clicking in the dial divide and multiply by 2
![]() The Red multiplier switch on the outside of the dial allows you to set the maximum range. This is particularly useful for setting very low values in oscillator and filters (you might, for example, want to have a very slow oscillator controlling a filter to create a slow sweeping filter effect).
The Red multiplier switch on the outside of the dial allows you to set the maximum range. This is particularly useful for setting very low values in oscillator and filters (you might, for example, want to have a very slow oscillator controlling a filter to create a slow sweeping filter effect).
![]() The numerical display also has a few extra features.
You can type a value in on the keyboard and it will be entered in the numerical display of the parameter that has the focus (the edge of the Display is highlighted in red when it has the focus).
The numerical display also has a few extra features.
You can type a value in on the keyboard and it will be entered in the numerical display of the parameter that has the focus (the edge of the Display is highlighted in red when it has the focus).
![]() The display for MIDI Controller has a Ślearną feature which can be used to easily setup a MIDI Device to control CellSynth. Click in the display to give it the focus and then move the knob, slider or button (or whatever you have available) on your MIDI device that you wish to use to control the Cell. Now Click once more in the display and the correct MIDI controller will be assigned.
The display for MIDI Controller has a Ślearną feature which can be used to easily setup a MIDI Device to control CellSynth. Click in the display to give it the focus and then move the knob, slider or button (or whatever you have available) on your MIDI device that you wish to use to control the Cell. Now Click once more in the display and the correct MIDI controller will be assigned.
 |
These are CellSynth's 'tear off' sliders (fader). You can drag the slider window to any position you require. Use them to setup mixer like consoles to control various elements of your matrix. These sliders remain open even when you close the Cell Edit window and they are saved with a Matrix file.
Command-F will hide all the sliders.
![]() The only control we havenąt yet looked at is the switch. If any parameter can only be on or off, a switch is displayed.
The only control we havenąt yet looked at is the switch. If any parameter can only be on or off, a switch is displayed.
No hidden extras here, just a standard on / off switch!
 |
 |
Here is a Mixer Cell. Turn on Invert and the icon displays a minus symbol. |  |
 |
Here is a Panner Cell at its default setting of Mid. Pan to the left and the icon displays it. |  |
You can tell which cell in a Matrix you are editing because its Cell button appears depressed :( and the Cell's symbol is displayed in white.
 |
You can also tell from looking at the Cell button, whether its output is heard at output or not (heard=blue, muted=grey).
There is also a third state which has not yet been mentioned. If the button appears flat then it has been disabled. The disable function can be used to help understand what is going on in a matrix. By disabling a cell it is easy to see what its effect on the overall sound is. You can disable a whole branch of cells by turning off the cell at its root.
 |